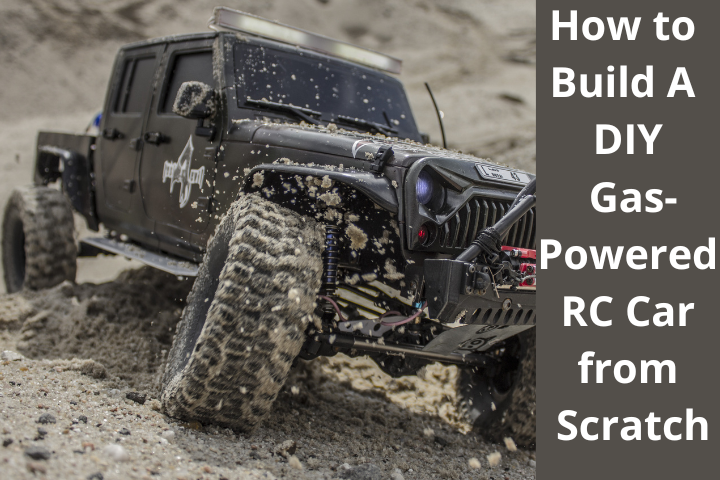

How to Build A DIY Gas-Powered RC Car from Scratch? Have you ever dreamed of building your own gas-powered RC car from scratch? It’s easier than you think! Not only can you customize the look and performance of your RC car but you can also save money by purchasing parts yourself. With a bit of patience, basic knowledge, and some DIY skills, you can have an awesome and unique RC car that will be sure to stand out among the rest. Building an RC car from scratch is not only fun but also a great way to learn about engines, mechanics, and other components of cars. So get ready to step up your RC game with a one-of-a-kind gas-powered model!
How to Build a DIY Gas-Powered RC Car from Scratch
1. Gather all necessary materials and tools
The first thing you need to do while making a gas-powered RC car is to collect all of the necessary supplies and tools. The following is a list of some of the specific supplies and tools that you could require:
- Gas-powered engine: This is the primary source of power for the vehicle, and it can be acquired from a retailer that specializes in hobby or RC cars.
- Radio control equipment: This comes with a transmitter as well as a receiver, both of which allow you to control the operations and motions of the vehicle.
- Chassis: This is the foundation of the vehicle, and you can either buy it as a kit or construct it yourself from scratch using components made of aluminum or carbon fiber.
- Wheels and tires: These can be obtained from a retailer that specializes in hobbies or RC cars and should be selected so that they are compatible with the terrain that the car will be driven on.
- Hardware: This contains things that are used to hold the car together, such as screws, nuts, bolts, and any other kind of fasteners.
- Fuel tank and fuel line: This is the location of the gasoline tank and the fuel delivery system for the engine.
- Exhaust pipe: Because of this, the automobile will be able to let the exhaust from the engine out.
- Steering and throttle control systems: Because of this, you have the ability to control the car’s speed as well as its motions.
- Tools: In order to put together the car and perform maintenance on it, you will require a number of tools, including screwdrivers, pliers, wrenches, and a drill.
It is essential to ensure that you have all of the necessary components and equipment before beginning construction on the vehicle. This will allow you to prevent any problems from developing during the construction process and ensure that the vehicle is completed correctly and is safe to drive.
2. Begin by assembling the chassis and attaching the wheels and tires.
The building of a successful gas-powered RC car begins with the assembly of the chassis, followed by the attachment of the wheels and tires. This is the cornerstone of any successful RC car build. Before you begin the process of building, check to see that all of the wiring and accessories are properly linked to the components to which they belong. To get started, get an Allen wrench and use it to firmly attach your wheels and tires to the chassis of your vehicle. You want to make sure that they are fastened in such a way that there is no room for movement or gaps between them. After you have ensured that they are securely linked, use screws to further secure each wheel so that it cannot be dislodged while you are driving. This will ensure that the wheel will not become detached while you are driving. When you begin the process of building your car, making sure to follow these steps will help you get off to a good start.
3. Mount the gas-powered engine onto the chassis and connect it to the radio control equipment.
To construct a radio-controlled car that runs on gas, you are going to need a lot of different parts and pieces of machinery. But before we get to that, let’s get the most crucial step out of the way first: connecting the gas-powered engine to the radio control gear and mounting it on the chassis. This is a technique that can be difficult to complete since you will need to correctly locate adequate attachment places and twist screws. After that step is finished, you will need to ensure that all of the cables are routed appropriately and securely so that your radio-controlled car may operate at its peak potential when it is being driven on the track. When you have finished putting everything where it should be, all that is left to do is put gas in your new automobile, double check all of the settings one last time, and then press the gas pedal.
4. Install the fuel tank and connect it to the carburetor and engine.
An fascinating project for any do-it-yourself enthusiast may be the construction of a gas-powered remote control automobile. It needs perseverance, careful attention to detail, and the utilization of appropriate components. The fuel tank is an essential component in the process of putting together the engine since it is responsible for safely storing the gasoline and delivering it to the carburetor. In order to properly install the tank, you must initially attach rubber hoses to the appropriate connections on the carburetor and the motor, and then you must tighten the clamps to provide additional support. After that, you should apply silicone sealant to make a link between all of the components that is watertight. When all is said and done, ensuring that a fuel tank has been installed correctly in an RC car helps to ensure that the vehicle will have plenty of power when it is first used.
5. Assemble the steering and throttle control systems, and connect them to the servo and radio control equipment.
The assembly of the steering and throttle control systems, as well as the connecting of the servo and RC equipment, are required steps in the construction of a remote control (RC) automobile that is powered by gas. In order for your model car to work properly, you will need to mount the steering servo, connect it to the steering link kit, and wire it to the radio control receiver. Additionally, you will need to create a throttle arm linkage that connects the engine carburetor and the throttle servo. All of these systems need to be put together in a secure manner. In addition, in order to deploy these components in the most effective manner, tying them together requires a significant amount of attention. Any wrong connections could result in significant problems in the future. You will be able to make use of your brand-new radio-controlled vehicle as soon as all of its components have been assembled and connected to one another in the appropriate manner.
6. Install the air filter and exhaust system.
The installation of an air filter and exhaust system in a gas-powered radio-controlled car is not very difficult and typically takes no more than a few minutes to complete. Using a rotary tool or some other type of mounting equipment, you will need to complete the procedure by connecting the intake pipe of the air filter to the stock carburetor of your vehicle. After you have ensured that everything is in place, you will need to connect the exhaust pipe to the air filter. It is highly suggested that you find a professional to assist you in this operation because poor installation could have a significant effect on the performance of your vehicle. If you are unable to get a professional to assist you, you should find one as soon as possible. After all of the essential attachments have been made, you should inspect the overall fitting of all of the components and then secure them using bolting hardware and fastening nuts. In conclusion, if you want your gas-powered RC car to function at its absolute best, you should make it a habit to frequently repair any components that show signs of wear.
7. Connect the battery and power on the radio control equipment
In order to begin testing the fundamental motions of a gas-powered RC car, one of the necessary steps is to connect the battery and turn on the power to the radio control equipment. After you have connected the battery, you will need to make adjustments to the forward, backward, left, and right movements of the device using the remote control. To make this process go more smoothly, it would be helpful to ensure that the area in which you are conducting the test is devoid of any impediments as well as any potential hazards for those who are taking part in it. Before you start your tests with your gas-powered RC car, you need to make sure that you have also prepared a detailed checklist covering any potential problems and any other necessary preparations. After you have completed these basic steps, you will be able to commence testing with complete assurance and safety.
8. Adjust the gear ratio to match the engine and the type of car
When it comes to getting the most out of your gas-powered remote control car, the gear ratio is one of the most crucial aspects to take into consideration. Changing the size of either the pinion gear or the spur gear is one way to alter the gear ratio. However, in order to achieve the best possible results, it is imperative to make sure that both gears are set appropriately. It’s possible that different kinds of cars need slightly different ratios, like how off-road vehicles need a lower overall ratio, but adjusting the gear ratio gives you the ability to tailor the way your car drives to exactly how you want it to, whether you want it to accelerate quickly or have a higher top speed. It is also important to note that greater ratios boost efficiency; so, if you are interested in spending more time on the track, this is something that you should think about giving some thought to!
9. Set the idle speed, high-speed needle, and low-speed needle on the carburetor to the recommended settings.
To ensure the best performance from your gas-powered RC car, it is essential to set the idle speed, high-speed needle, and low-speed needle on the carburetor to the manufacturer’s recommended settings. These settings vary depending on the make and model of your car; however, it should be relatively easy to find what these settings should be by consulting either your vehicle manual or an online resource such as a forum page. To configure correctly, use an adjustable screwdriver or small wrench if necessary. Be sure to wear safety goggles when adjusting parts of your RC car to prevent any potential eye injuries. With these proper adjustments, you can expect improved visibility, throttle response and acceleration from the gas-powered RC car!
10. Adjust the servo, linkage, and control horns for proper movement and control.
Many RC ads promise the ultimate driving experience, and that starts with properly setting up your control system. Adjusting the linkage, servo, and control horn is essential to getting the right feel from you gas-powered RC car, and just a few simple steps can ensure your car is ready for the track. Start by adjusting your servo – make sure it puts out the maximum amount of torque while still staying within spec. Next, finetune your linkage setup to get smooth movement without any binding or dead spots. Finally, pick the right control horn for your setup to ensure precision handling no matter what kind of situation you find yourself in while racing. With a few simple adjustments you’re sure to have a car that will turn heads at the track!
11. Test drive the car and make any necessary adjustments.
Rev your engine and take a test drive with your new gas-powered RC car. Enjoy the great design, power, and speed of your little racer. A test drive will allow you to become familiar with the car’s various features and let you make any necessary adjustments. If a part needs to be tightened or lubricated, do it at this time for maximum performance. Be sure to check the brakes and steering as testing provides a great opportunity to identify any issues before free-spirited racing. Have fun, but also be sure that safety is the top priority.
12. Install the body and any additional decorative parts.
Installing the body and any other additional decorative parts to a gas-powered RC car can be an exciting and rewarding experience for proof that your efforts have paid off. You’ll need to ensure that the body is securely mounted so it won’t come loose in the middle of a race, or worse, cause an accident. You also need to ensure that the radio control system is connected properly; otherwise, you won’t be able to control the vehicle once it’s in motion. Adding any kind of decorative part or sticker should always be done last; this will help preserve its aesthetic value while allowing you to keep the structural integrity of your car intact. With some patience and attention to detail, you can give your gas-powered RC car its own unique look that’ll help make it stand out from anyone else’s.
Read Also: What Is an ESC For RC Cars
Conclusion
If you are a thrill-seeking, adrenaline-pumping enthusiast who loves taking overlooked objects and transforming them into something awesome, then constructing a DIY gas-powered RC car from scratch might be just the challenge for you. Aside from being incredibly rewarding, building your own remote control car is an educational opportunity, too. You’ll get to learn about mechanics, engineering principles, and all of the challenges that come with assembly. Plus, with all of the customization options available to you once your build is complete, you can show off your newfound skills and create an entirely unique machine unlike anything else on the market. So if you think you have what it takes to take on a project like this one, then why not get started building today?